People often ask me how the demos are made. Better yet, they ask me where to find source code. But I often hardly find the time to finish each issue, to find the space inside the issue to talk about the demo, or to adapt and publish the code online.
So, the newsletter is changing. One week we'll explore a different topic, and the following week we'll make a case study of the demo. This issue is that case study.
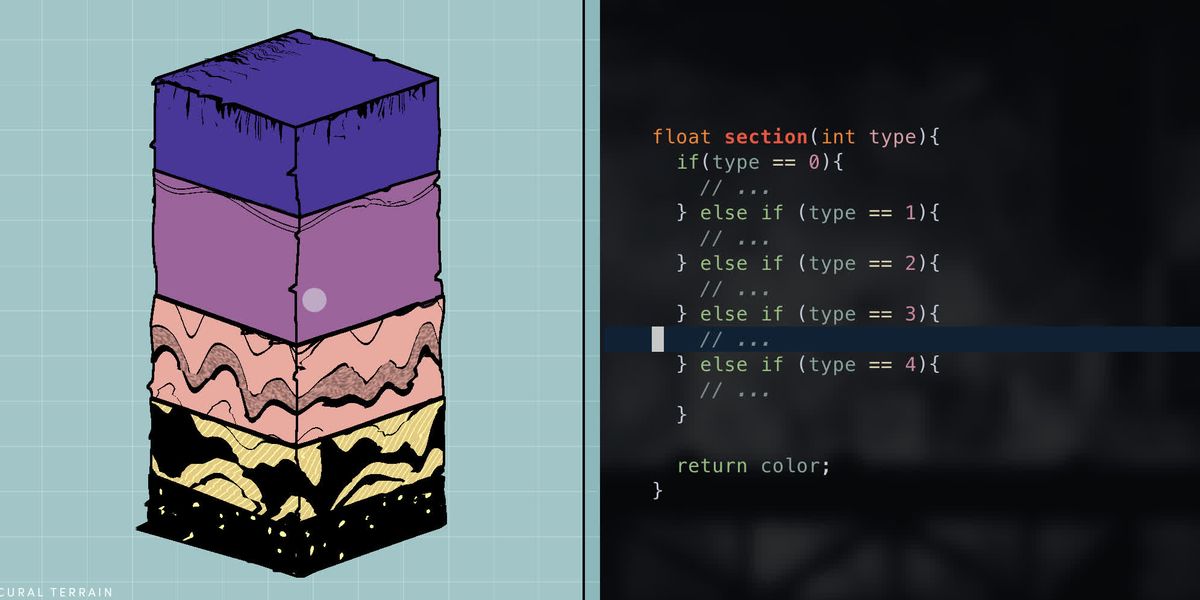
In this week's demo, all the rocks in this demo re-use the same shader. Each section makes its own material, but they all use a single shader with a bunch of branching. Spooky branching. Not Really. But first, what inspired the demo?
Inspiration: Cubes
Initially, the idea was to build a square-like terrarium. But when I saw this geology-like design which made me curious about how it would work with shaders. So, I decided to try to replicate it but using Webgl and giving it my little piece of flavor.
sponsor

Become a sponsor with your sponsor spot here!
Promote your product/company in this spot to hundreds of creative developers interested in learning and creating. One spot per issue!
Learn More!Case Study
Single shader with branching
While the fragment shader has 5 "if" branches, the actual object's render follows a single path. So, when the GPU renders an object, all its pixels do the same work. So, there isn't much branching at all.
This made the work very localized and simple. For a simple demo, it works wonders.
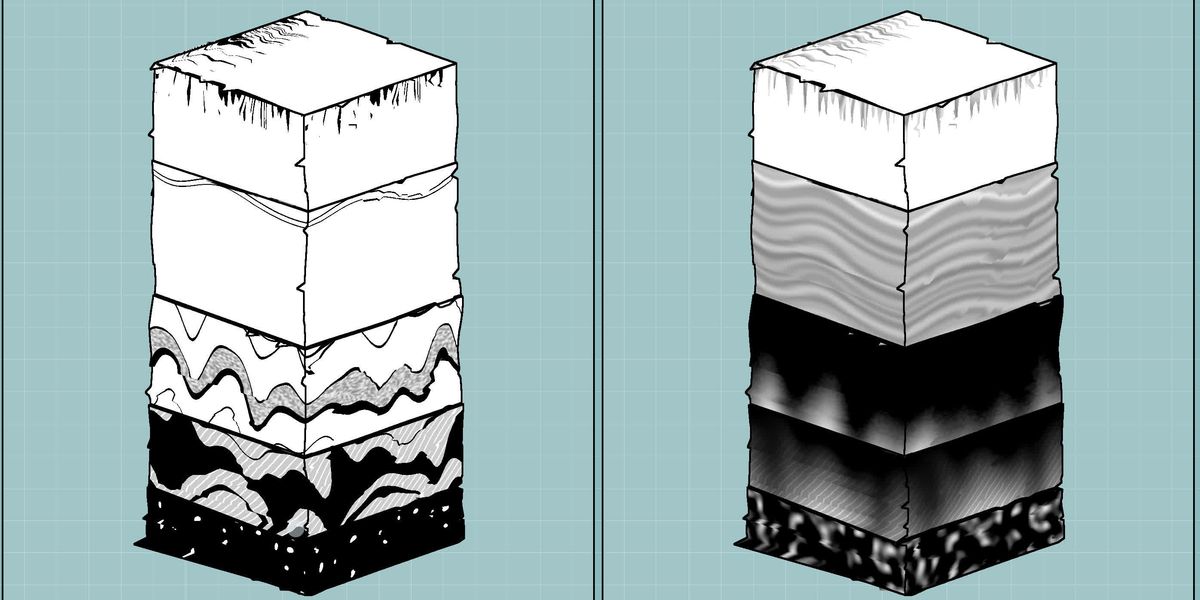
Noise
The noise works with the uv.y to create different bands vertically. And the uv.x to displace the Y position and create the waves. It works about the same for all sections.
To create horizontal continuity between the faces of the same cube. The UV used for the noise is displaced by 1,2 or 3 depending on the face. This makes each face start its noise sampling where the last one ended.
float circularNoise(float angle, float radius, float offset){
	vec2 circle = vec2(cos(angle * PI * 2.), sin(angle * PI * 2.)) * radius;
  return noise(vec3(circle, offset) ) * 0.5 + 0.5;
}
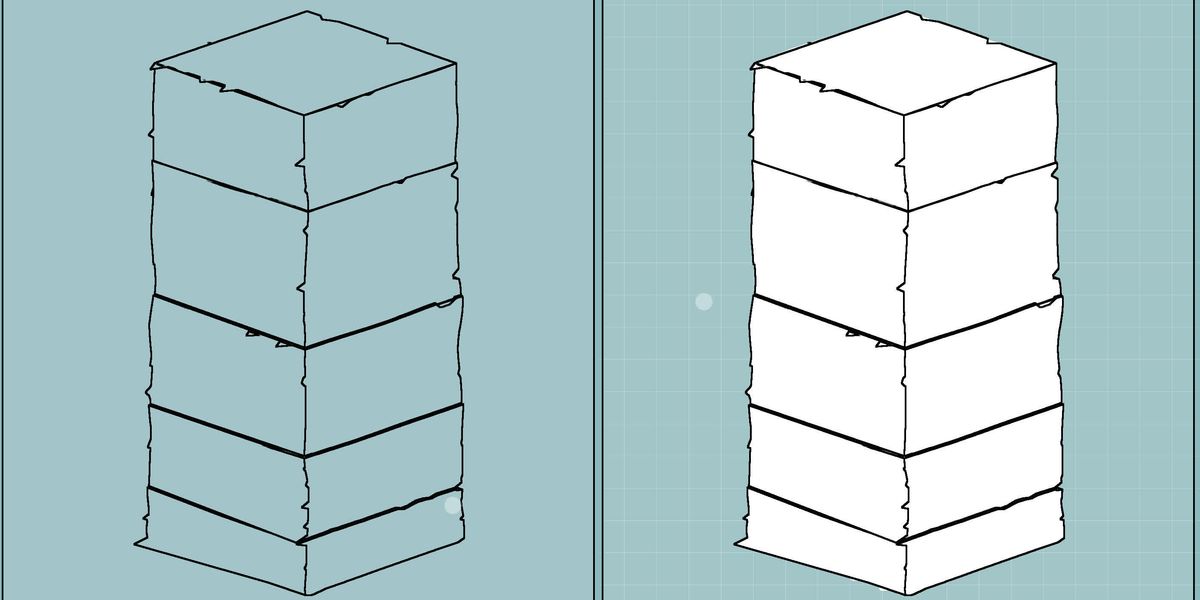
Postprocessing - Edge detection
Usually edge detection only uses normals/depth, which makes the faces with the same faces "blend" together and not have a different outline unless they are at a different depth.
For edge detection in this demo, I rendered a second scene with the cubes with normals and the cube Index. The cube index allowed each cube to have a different "color" which made it possible to create the outline for each face of the cube even when they were touching